
This is Marie, contributing a story about homemade pizza. I’ve always been a touch picky about toppings and the like, and had thought for quite some time in my optimistic (and somewhat incompetent) twenties that homemade pizza would be the answer – except for the fact that all my attempts had been really disappointing and not at all worth the time. After all, once you factor in the cost of all the ingredients, it really isn’t that much cheaper to do the pizza yourself!
However, then I ran into the following, which looked quite promising: http://www.bonappetit.com/recipe/grandma-style-pizza-dough
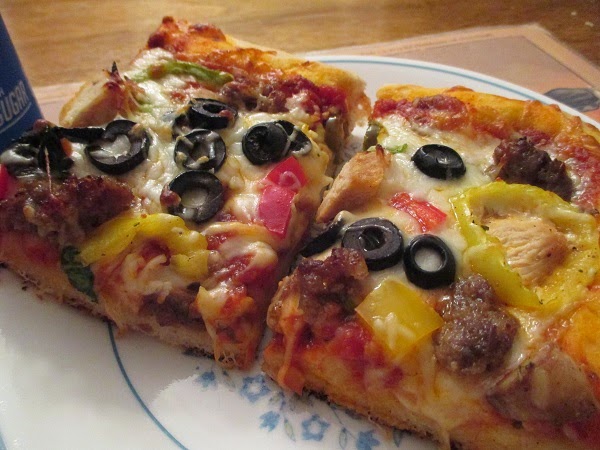
So far I’ve done this twice. The biggest challenge seems to be timing the removal correctly so the bottom doesn’t get too dark. The dough makes a pizza big enough to feed the four of us with leftovers now, so I anticipate that by the time the 3 1/2 year old is 14 he’ll have his own while the rest of us share one.
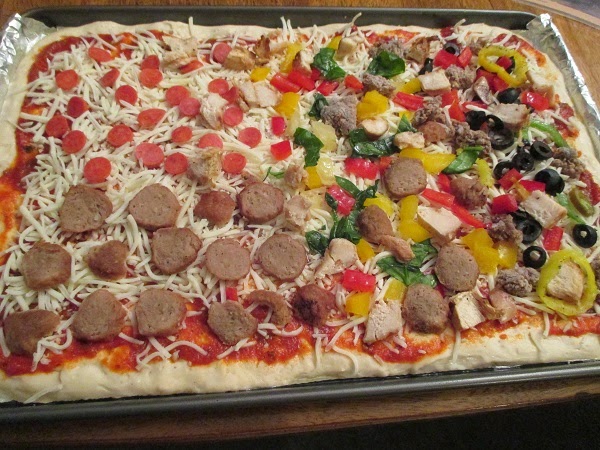
The important time points are 24 hours and 1.5 hours. The dough needs to sit in the fridge at least overnight. While the prep time for stretching the dough, letting it rise, decorating it, and the baking individually don’t take a huge amount of time each, they do need to happen in proper sequence, and decorating takes longer than you think when you need to make a separate quadrant for each person. Therefore, for us this will be a Sunday dinner until and unless the teenager decides she can handle prepping the dough. When that happens I assume we will have pizza at least every other “teen cooks” day. Because once the fussy bits become routine, this should be something that can be done while face timing someone, watching tv, and listening to music simultaneously. As long as someone is watching the oven, that is.
Pizza dough
2 1/4 tsp yeast, or one packet
2 tbsp olive oil, plus 1/2 cup, plus a bit for the bowl
2 tsp kosher salt
4 cups flour plus some for the surface
Mix yeast and a tsp or so sugar into a bowl of warm (not hot) water and wait about 10 minutes for the yeast to start eating up the sugar; water will show some foam if the yeast is active. If no foam in 10 minutes, either the water was too cold or your yeast is old. Try again.
Mix in oil, salt, and half the flour. Add remaining flour 1 cup at a time, mixing just until dough forms (it will look rough or shaggy)
On a lightly floured surface knead until soft and elastic, about 10 minutes and form into a ball
Oil a large bowl, Put in the dough and cover tightly with plastic wrap. If your bowl is only twice the size of the dough, oil the interior of the plastic wrap as well to keep it from sticking, but it is better to use a bigger bowl than you think could possibly be needed (if you are new to yeast dough, that is).
Chill 24 hours. You can “cheat” by leaving the bowl on the counter for an hour first and then chilling only about 8 hours but the 24 hour rise has better results.
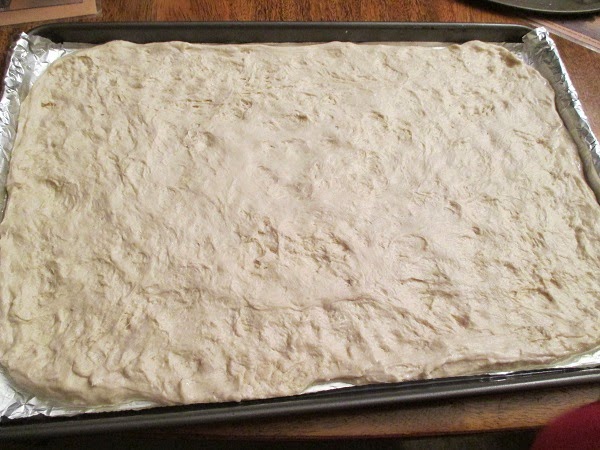
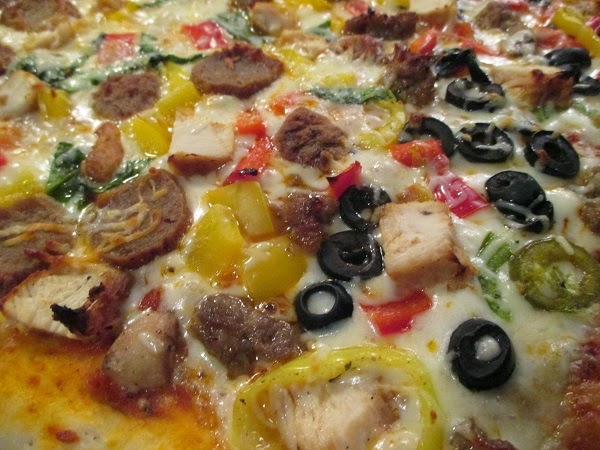
Put 1/2 cup oil on a large cookie sheet with high edges and stretch the dough gently until it reaches all the corners. The oil is to keep the crust from sticking-remember olive oil is good fat! Skimping may leave crust stuck to your cookie sheet. The cold dough will resist a bit at first so let it rest a few minutes between attempts if needed. Top with whatever you like, keeping a light hand on the wetter ingredients, and bake at 425 (less if cookie sheet is dark nonstick) on the bottom third of the oven. Keep a sharp eye on the pizza and take it out when the crust browns and the cheese melts; the recipe says 20 minutes but that may be too long for your oven.
Experiment and share your photos! We want to see what you do with it!
If you’re only reading these chapters, then you are missing so much! Follow us on Facebook, where you can get more information about our favorite places, including PR news, links when our friends-in-blogging visit them, and other follow-ups about the places we’ve been when we can find it. Give us a like, hover over that LIKED button and check “Get Notifications” and please share and tell your friends to try us!
